Tuesday, October 14, 2014

American Classics Nail Treatments


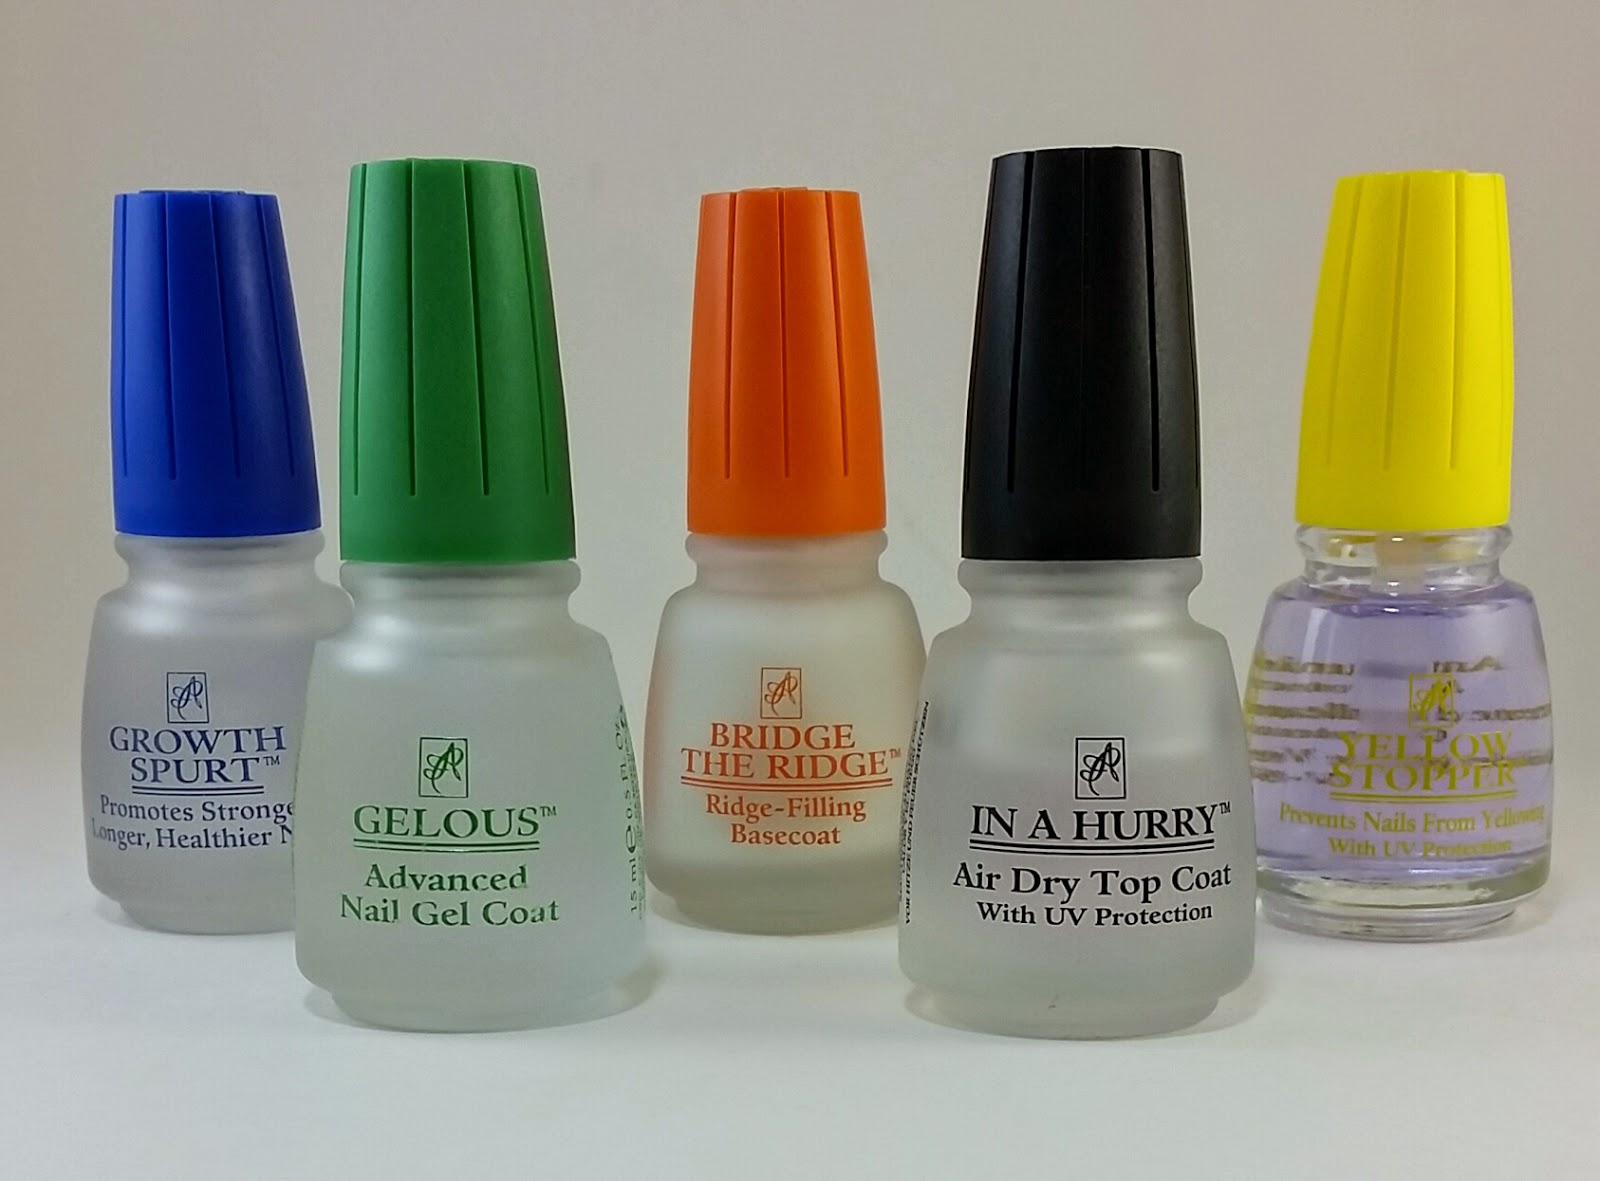
Hey everyone! Today I have a blog post and review of the American Classics Nail Treatments. This is a really great line of products and I'm excited to share them with you. Let's get started!

First, I'll start with Growth Spurt. This treatment has a keratin rich formula that promotes strong, healthy nail growth. For those of you who don't know, I'm a Registered Nurse at a hospital and I wash and sanitize my hands a ridiculous amount of times per day, which leaves my nails weak and peeling. When I received these products, I had just chopped all of my nails off. I started using this product as a base coat, and while I don't think it particularly helped my nails with their peeling problem, it definitely helped them grow. I'm going to keep using this product as a base coat, maybe in conjunction with some other products to try and find my ideal nail growth combination!

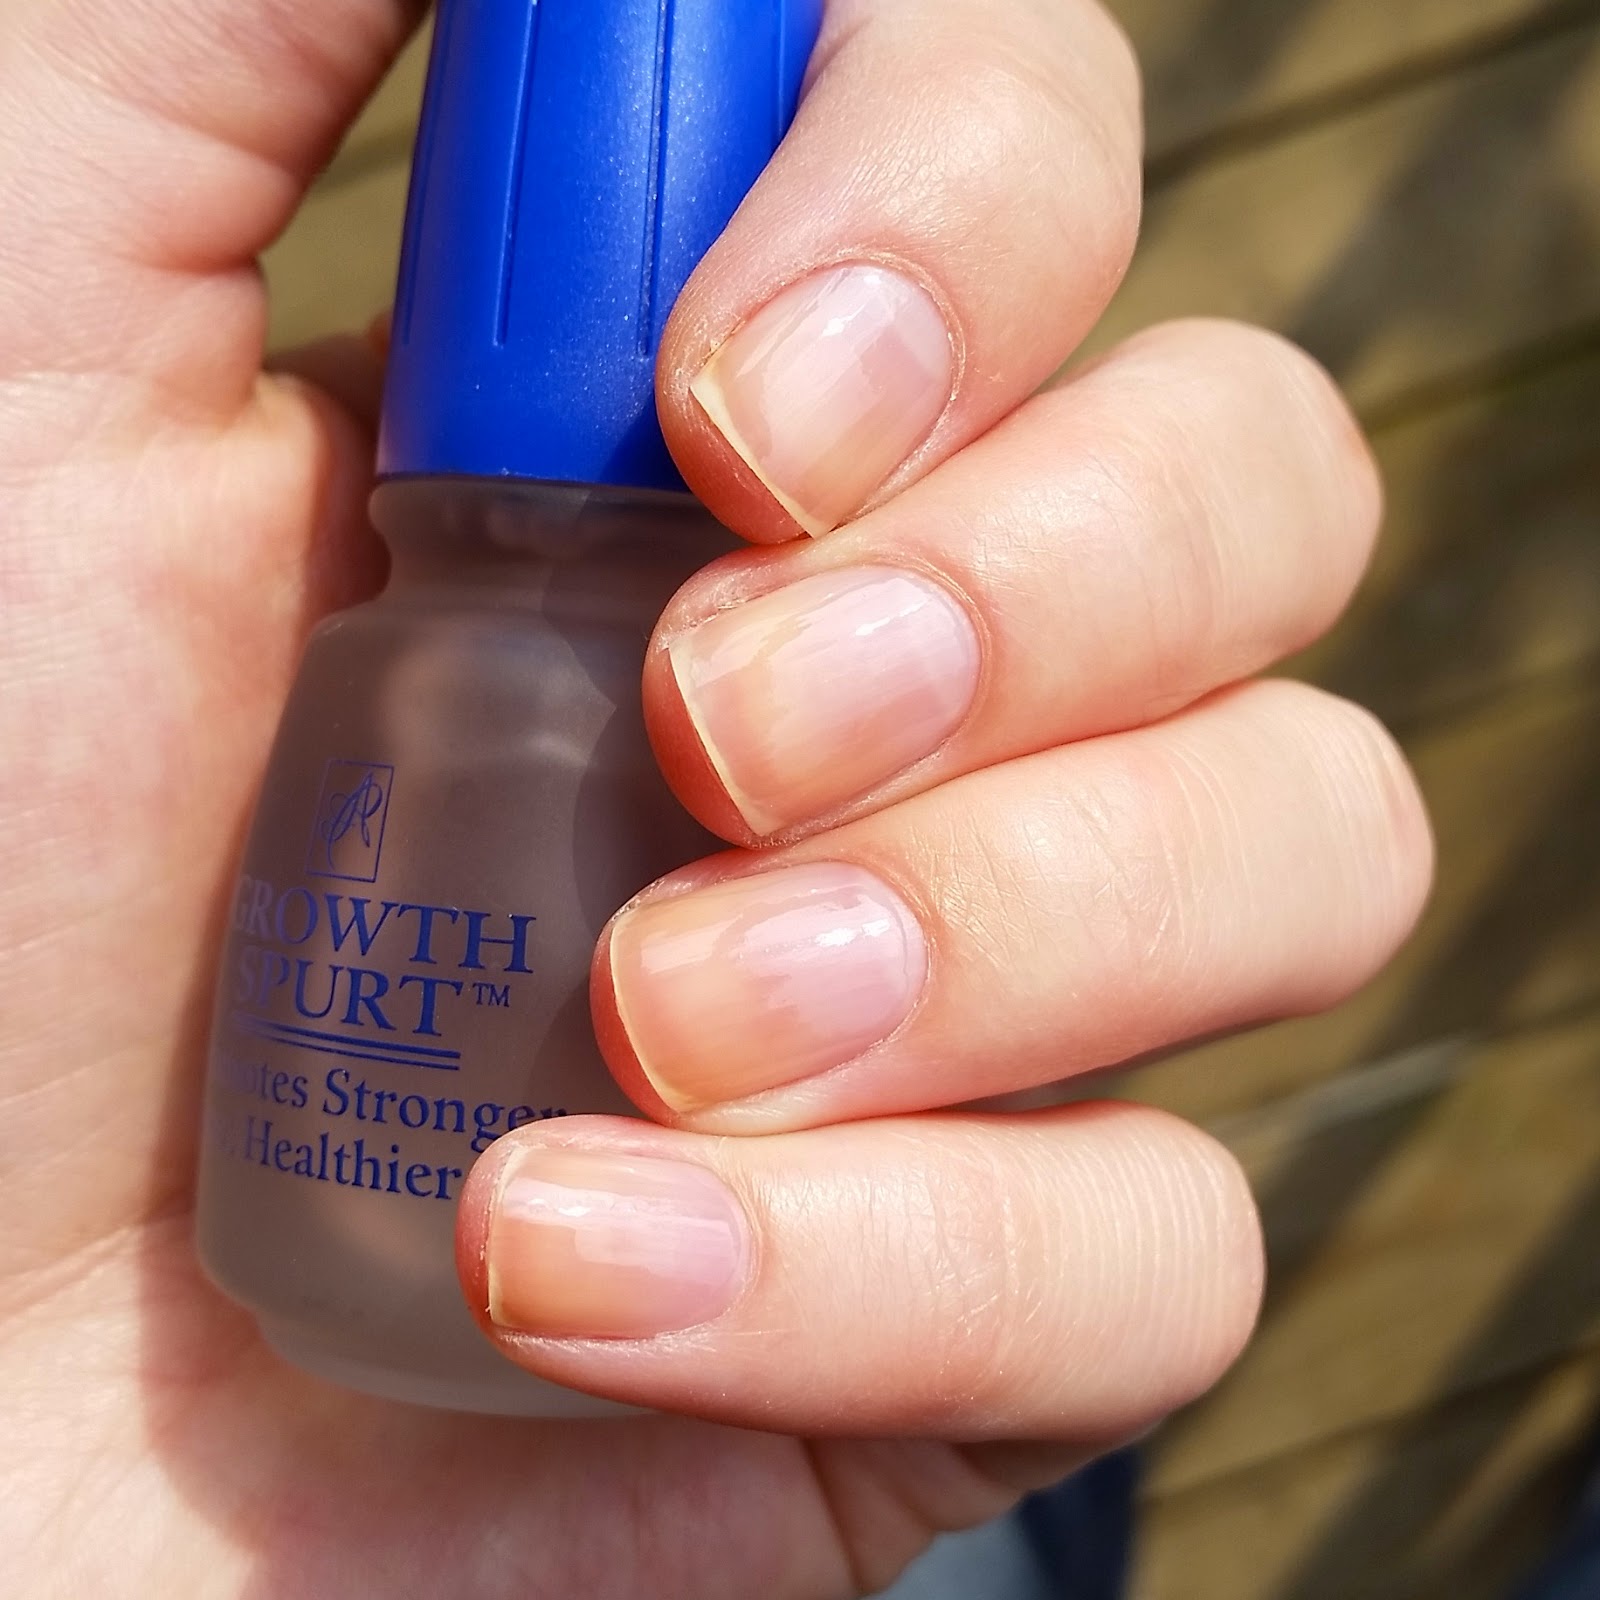
Day #1 of Growth Spurt
Day #10 of Growth Spurt

Bridge the Ridge is actually a product that I've bought before for my mother. She had some really bad ridges in her thumbs from years of biting at them. I bought her this product and it really worked wonders for her. She could apply nail polish and it looked smooth and perfect on her nails. When I received this product, I knew exactly what I would use it for. As I mentioned above, my nails peel like crazy. This leaves ridges in my nails that normally aren't noticeable under most polishes, but stand out like a sore thumb when I use foils or metallic polishes. One coat of Bridge the Ridge and BAM! Perfectly smooth base for foils. I even like the way this product looks by itself. I'm super happy with this product! I used Essie Penny Talk to showcase this awesome base coat.

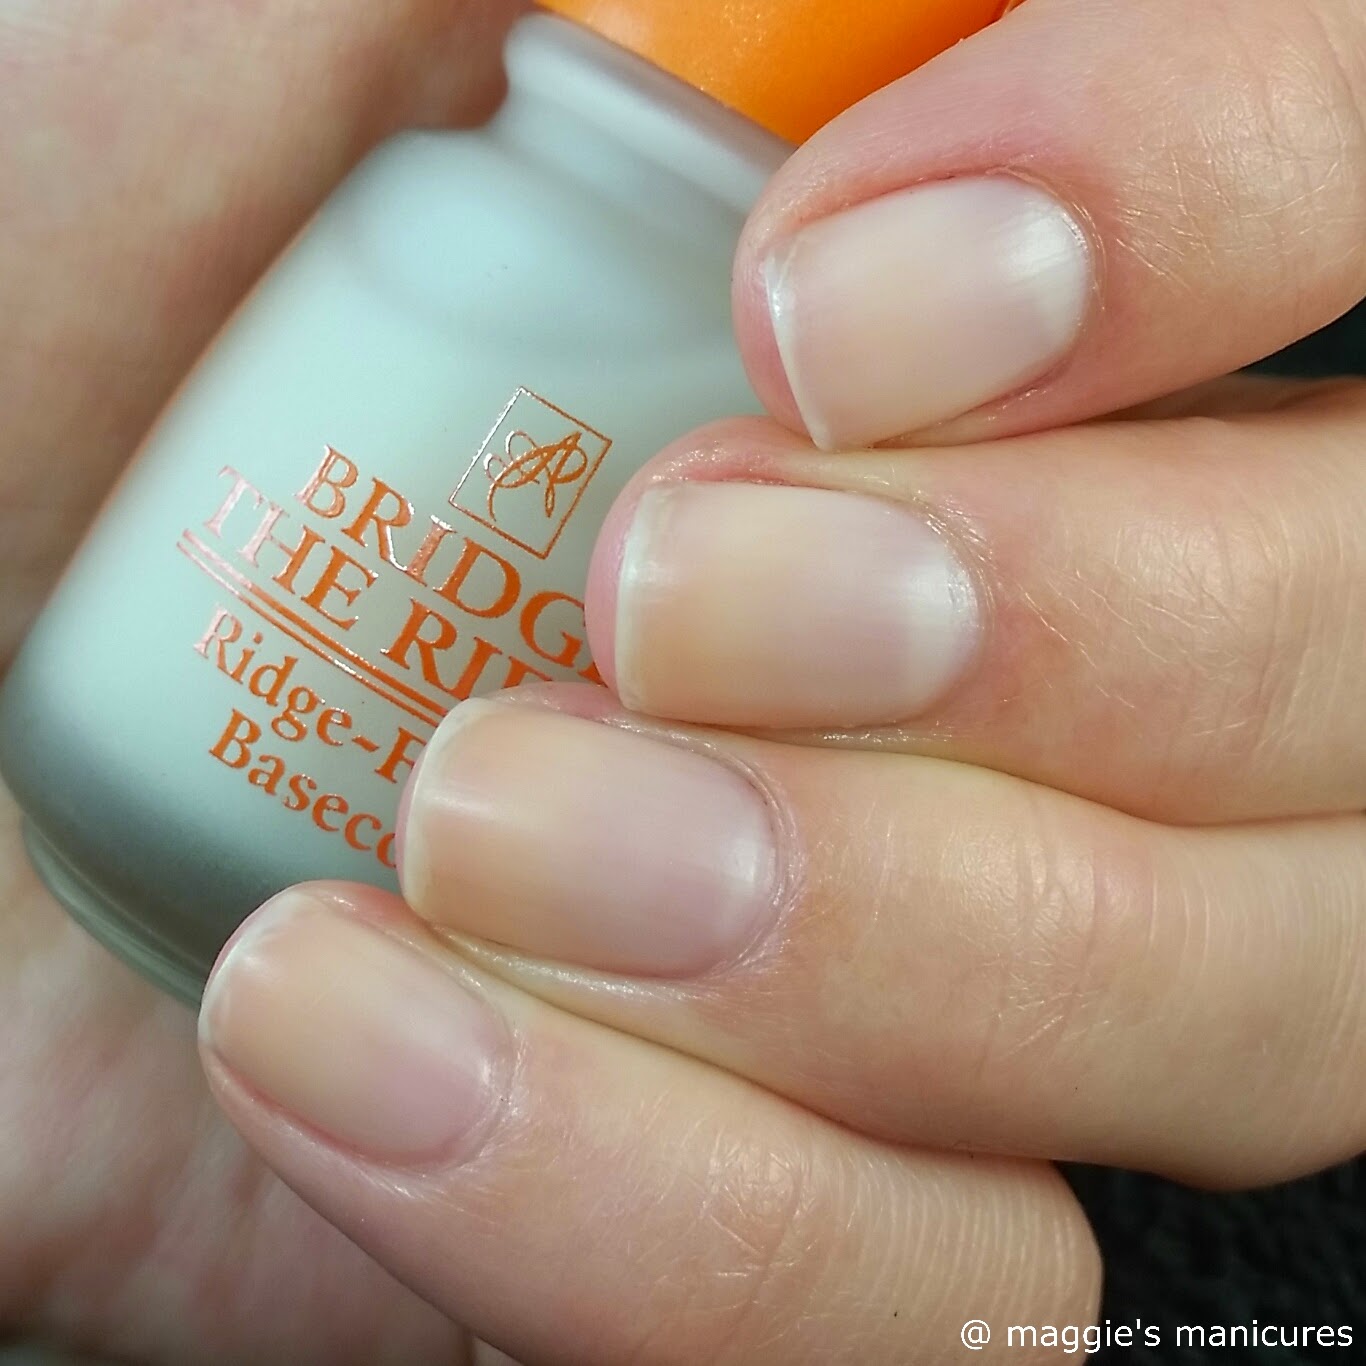
Bridge the Ridge alone

The smoothness!!!

In a Hurry is an awesome, super shiny, quick dry top coat. I think this top coat is right up there with Seche Vite and Poshe Super-Fast Drying Topcoat (my current favorite) - and the best part is that it's cheaper than both of those products. It's pretty much everything you could want in a top coat - quick drying, super shiny and good protection for your manicure. And, as far as I can tell, it doesn't shrink my manicures like Seche Vite does. I had manicures last for four days with minimal tip wear when using this product, which is awesome as far as I'm concerned. I've already used almost half the bottle and the formula is still as good as when I first opened it. Good job on this one, American Classics. Shown below is one coat of In a Hurry over KBShimmer Shade Shifter.

The shininess!!!

Gealous is an interesting product, designed to add natural thickness and create a gel barrier around your nails to seal in your manicure. I've seen people use this as a base coat, in between layers of color, and as a top coat. I used this product as a base coat, as it is not naturally fast drying (my quick-dry top coats have completely spoiled me). I used one layer of Gealous, two coats of Zoya Payton and then one coat of In A Hurry. The result was absolutely gorgeous - it was so SHINY. I could see my reflection in my nails and let me just say, I was impressed. I really liked the fact that this product adds thickness to my weak nails - it made them feel much more resilient without having to add a million layers of polish. I can't wait to play with this polish some more and find other ways of using it. Another awesome product!

Gorgeousness!


Yellow Stopper is a polish designed to protect against yellowing of the nails. When you apply it alone, it gives your nails a bluish hue. I tried photographing it and failed, so I'll just tell you about it instead. First of all, I would not recommend this product as a base coat if you like to keep your manicure for more than a day. The formula is such that it really makes your polish peel off, so much that I've actually seen some people on Instagram use this as a peel off base coat. Because of the hue that it gives your nails, it's recommended as a clear coat on natural nails or over french manicures, not over color. To be honest, I use this product on my toes and that's about it. I don't have really bad problems with yellowing nails (either that or I'm just so used to my yellow nails that I don't even notice them anymore) and I also don't really like peel off base coats, so I don't see myself using this product very much.

Overall, I'm really impressed with this line of nail treatments from American Classics. Their products are super affordable and high quality. I also heard they are going to be rolling out a new product soon, so keep your eyes open! You can buy these products at Sally's Beauty Supply or online at Amazon.com.

Thanks for reading!

xoxo Maggie


Wednesday, September 24, 2014

OPI Do You Have this Color in Stock-holm

Hey everyone! It's my favorite time of the year - autumn! And with it comes this beautiful polish from the OPI 2014 Nordic Collection. This is Do You Have this Color in Stock-holm, an absolutely gorgeous blue-violet creme. The formula was smooth, buttery, and perfectly opaque in two coats. I can see myself grabbing this a lot this season. I've only had it for less than two weeks and I've alreadt worn it twice! For some nail art, I used Essie Nothing Else Metals, a lavender foil, and Konad stamping plate M64. It's been forEVER since I've done any stamping and I'm really pleased with how it came out. These two colors work really well together.


Thanks for reading!

xoxo Maggie

Friday, September 12, 2014

Colorful Autumn Gradient

Hey everyone! Today I have an autumn inspired manicure! I'm so ready for autumn but it's still pretty warm outside, so I figured this manicure was a happy medium.

I based this manicure off of KBShimmer You Autumn Know, which I painted on my thumb, middle and ring fingers. Then I made a gradient using Zoya Audrina (magenta), Arizona (orange) and Pippa (yellow) over a white base on my index and pinkie fingers. Then I topped it off using American Classics In A Hurry Air Dry Top Coat.


Lay it on me, autumn! Who's with me??

Thanks for reading!

xoxo Maggie

Saturday, August 23, 2014

Clown Puke Jelly Sandwich

Hey everyone! Quick and easy post today. I wanted to do something simple, but more than just a plain manicure. So I thought, what's better than a jelly sandwich?

I started off with two coats of OPI Don't Touch My Tutu, a grey - white jelly. The formula is fairly easy to work with. There aren't as many bald patches that occur when applying this polish as compared to most jelly formulas. Then, I dabbed on one "coat" of KBShimmer Clown Puke, which is a clear glitter topper with over 100 different kinds of glitters. Every nail will look different! Finally, added another very thin coat of Don't Touch My Tutu and topped it off with Poshe Quick Dry TC. I love the jelly sandwich effect! It's so fun and easy to do.


Look at all that gorgeous glitter!

Thanks for reading!
xoxo Maggie

Thursday, August 21, 2014

Born Pretty Store Holographic Polish Swatch and Review

Hey everyone! Today I have a two holographic polishes from Born Pretty Store to review. The formulas for these were the same so I'll talk about them here. They were both smooth and easy to apply and required only 2 coats for full coverage. I really like these holos because the base color isn't as grayed out when they aren't in direct light like many holo polishes can be. The holographic effect is pretty strong in both polishes, too. In the photos below I snapped shots in both direct and indirect lighting. I did not use top coat for these swatches. Now the fun part - pictures!

#11 (Item #4609) is a really pretty purple with red undertones.
Direct Lighting

Indirect Lighting

#12 (Item #4610) is a stunning emerald green polish with blue undertones.

Direct Lighting

Indirect Lighting

You can buy both these polishes and more (much more) at the Born Pretty Store website here. Use the coupon code AZJ61 to receive 10% off your entire order! 

Thanks for reading!

xoxo Maggie 

*These products were provided for me for the purpose of honest review*

Sunday, August 10, 2014

Cult Cosmetics Swatch and Review

Hey everyone! Today I have some products from Cult Cosmetics to review. I was going to post these forever ago but the pictures I had taken of the swatches died along with my old phone, so I had to do them ALL over again! What a drag. Anyway, I'm anxious to get this project finished, so let's get started!

First up is Abbott Kinney, a silver metallic polish with a warm coppery undertone. The formula was smooth and easy to apply. I used two coats plus top coat for the photo below.


Abbott Kinney


Next is El Porto, a white creme. I was really impressed with the formula of this white. Although the first coat was slightly streaky, it dried fast and evened out on the second coat. I used two coats plus top coat in the photo below.


El Porto


Next is Catalina, a dusty cornflower blue creme. The formula was slightly thick, but in a good way, as it was smooth, creamy and easy to work with. It was almost a one coater, but I used two plus top coat to touch up a couple of spots.


Catalina


Next is Coachella, my absolute FAVORITE out of the bunch. It's a gorgeous, soft grey linear holo. The holographic effect was strong but subtle and not too in-your-face. The formula was very easy to work with. You could use two to three coats, depending on how much VNL (visible nail line) you care to see. I used three coats plus top coat for the pictures below, and as you can see, there's minimal VNL. I took photos of this polish in both direct and indirect light to show off the holo effect.


Coachella - Indirect Lighting
Coachella - Direct Lighting


Next is Laguna, a perfect watermelon creme - not too red, not too pink. I love this color for spring and summer! The formula was very similar to Catalina, thick, smooth and creamy - very easy to work with. I used two coats plus top coat for the photo below.


Laguna


Next is Weho, a glitter topper with pearly white hexes, black hexes and black bars. The glitter payoff was good. Unfortunately, the black bars in this polish are thick and have a curve to them that make them stick up off the nail no matter how they're lying. If there were no bar glitters in this polish, I would have absolutely loved it. I used one coat over Laguna plus top coat for the photo below.


Weho over Laguna


Next is Melrose Place, your typical silver foil. The formula on this was thicker than most foils, which I found made it very easy to work with. Like most foils, the brushstrokes were prominent. I'm not a huge fan of foils in general, but that being said, I would rate this one higher than most. I used two coats plus top coat in the photo below. If you have perfectly ridge free/not-peeling nails, you could definitely get away with one coat. Sadly, I do not, so I used a second coat to help cover up the blemishes of my nails (the thickness of the formula helped cover them up as well, which is also a plus).


Melrose Place

Next we have Hollywood Forever, a blue-green iridescent flakie glitter topper. The glitter payoff was so-so, I ended up using two coats for this swatch. Some of the larger flakies wanted to stick up off the nail, but all I needed to do was press down on them lightly with my finger before adding a generous amount of top coat to help them lay flat. I layered Hollywood Forever over OPI Onyx in the photo below.


Hollywood Forever over OPI Onyx


The last polish I have to show you is Hardtop Heaven, a top coat. I was pretty disappointed in this polish. First, when I applied it, it created a weird, streaky effect in the base color. This is the opposite in what you want in a top coat, which should smooth everything out. Secondly, this top coat dried pretty dull. Thirdly, it was not fast drying. Maybe my favorite fast drying top coats have spoiled me, but either way, I'll be sticking with them in the future. I used one coat over Laguna in the photo below.


Hardtop Heaven top coat over Laguna


Lastly, I have a lippie to show you! Muse is a red liquid lipstick that applies almost like a lip stain. It's long lasting and the color is phenomenal. My lips felt a little sticky after I first applied it, but the stickiness definitely decreased as it dried. Also, let's talk about the packaging. The lid of the lipstick has LED lights and the body has a MIRROR to help you put on your lipstick! How cool is that?? Make more of these, Cult! I adore them! I used around two coats for the photo below.


Muse

Overall, I am very impressed with the polishes that Cult Cosmetics has rolled out, especially their creme, holo and metallic polishes. They have awesome nail art kits that come with polishes, nail art brushes, striper polishes or dotting tools, depending on which kit you get. I think it's an awesome idea that promotes nail art! I received five dotting tools, three nail art brushes and two striper polishes from Cult Cosmetics. I used their polishes, dotting tools and a white striper polish to create the following nail art look:


For the vintage flower look, I first painted my index, middle and ring fingers with Catalina. Then I used the white striper polish to create the vertical lines. Next, I used a large dotting tool and Laguna to make big dots for the roses. Going back in with the white striper polish, I painted some white within the roses to make them more textured and realistic. Finally, I used a very small paint brush and a green polish to make flowers. The pinkie is just a gold glitter polish (I felt the design needed something sparkly!). Cult Cosmetics has a gold glitter called Stay Gold that I think would work really well with this manicure.

You can purchase these products and more on the Cult Cosmetics website here. Be sure to check out their Instagram page @cultcosmetics!

Thanks for reading!

xoxo Maggie


*These products were provided for me for the purpose of honest review*

Saturday, August 9, 2014

Vicious Flower Nail Art

Hey everyone! Today I have some nail art to share. This nail art was inspired by KBShimmer Vicious Circles, a gorgeous red jelly with holographic circle glitter, mini bars and micro glitter. I used three coats of Vicious Circles.  On my ring finger I used three coats of Cult Cosmetics Coachella, a dusty grey linear holo. Then I used a small dotting tool and Essie E-nuf Is E-nuf to make flower petals. I finished the look using red aurora borealis effect Swarovski crystals and my favorite Poshé top coat.


Thanks for reading!

Xoxo Maggie

Monday, July 14, 2014

Born Pretty Store Swatch and Review

Hey everyone! Today I have a review of some items sent to me by Born Pretty Store. Let's get started!

First, we have the Born Pretty Store Holographic Nail Varnish #8 - a medium blue holo. The formula was smooth and self-leveling without streaking or balding. This polish is mostly opaque in two coats with only a little VNL. I ended up using three coats, resulting in no VNL at all! The holographic effect of this polish was beautifully strong without graying out the blue base color in the shade, like some other holos tend to do. I'd definitely recommend this polish - I can't wait to try more shades! Shown below are pictures of the polish in both direct and indirect lighting.

Indirect lighting
Direct lighting

Next, I have some lovely water decals. This was the first time I had ever used decals and I am so pleased to say that they are delightfully fun and easy to use. They make nail art a snap - which is great for people like me who are awful at free-handing anything more than a simple flower :) I used my water decals as an accent on my ring finger over Essie The More The Merrier.


Finally, I have a seriously cute nail charm to show you - yet another product I've never tried before. These bow charms came in a pack of 10 and are so glittery and gorgeous! They curve in a way that fits very well to my curved nail shape.  I'm super impressed with these beautiful charms. Shown below is one nail charm on my ring finger as an accent with Zoya Jolene and Essie Set In Stones.


Born Pretty Store's products are so fun and easy to use, not to mention a great deal! You can get all these products and more by heading over to www.bornprettystore.com. Use the coupon code AZJ61 to receive 10% off your order.

Thanks for reading!

Maggie xoxo

*These products were provided for me for the purpose of honest review*

Saturday, June 28, 2014

Glittery Gradient

Hey everyone! I was craving some nail art so I whipped out some glitter and neons and this is what I came up with. I hope you like it!


On my thumb, index and pinkie fingers I used three coats of OPI Crown Me Already!. On my middle and ring fingers I made a gradient using China Glaze Bottoms Up (pink) and That's Shore Bright (purple) over a white base. Then I did some glitter placement using the medium silver hex glitters from Essie Set In Stones. I placed the glitters using a small dotting tool. Then I smoothed it all out with a coat of Poshe Quick Dry Top Coat, and voila! All done.

Thanks for reading!
Maggie xoxo

Thursday, May 22, 2014

Summer Striping Tape Nail Art

Hey everyone! I finally bought myself some striping tape! I know - I've been doing nail art for over three years and I should have definitely bought myself some by now, but it just hadn't happened yet! And now...I have all the striping tape I will ever need for the rest of my life :P

Here's what I came up with:


It was so warm and beautiful outside today that I decided I definitely needed some summery colors for this mani. I started off with two coats of my absolute favorite white nail polish, OPI My Boyfriend Scales Walls (shown below). Then I used one coat of Poshe Super Fast Drying Top Coat. I waited about half an hour to ensure the mani was completely dry, then taped off my nails in the patterns you see above. Then I used three Zoya cremes: Arizona (orange), Shelby (pink), and Blu (light blue). I finished off with another coat of Poshe Top Coat. This was my first time using striping tape and I have to say, I found it to be quite simple. In fact, the hardest part about it was finding where the tape began on the roll, cutting them into correct lengths, and not messing up my nails in the process! I got my striping tape on Amazon.com for a couple dollars. I'll definitely be trying more tape manis like this in the future!

OPI My Boyfriend Scales Walls

Thanks for reading!

Maggie xoxo

Monday, May 19, 2014

KBShimmer It's Razz-ical

Hey everyone! Today I have a review of KBShimmer's It's Razz-ical. I bought this polish for my cousin as a Christmas present this past year and now I'm really disappointed that I didn't purchase it for myself as well!


It's Razz-ical is described on the KBShimmer website as "a red-violet shade leaning towards the purple side of raspberry." There are micro to small holographic glitters throughout. I could have easily gotten away with using only two coats for this mani, but I decided on three for a little more depth. The formula, as always, was smooth and buttery. If you've read any of my other KBShimmer reviews, you will know that I am absolutely head over heels in love with these products. They are always perfect. And if I could justify it, I'd buy them all.

Thanks for reading,

Maggie xoxo

Friday, May 16, 2014

Essie Tart Deco

Hey everyone! Today I have a very simple post for you.


I used Essie Tart Deco, the very first Essie polish I ever bought. I still love it just as much now as I did then. It's a beautiful peach creme with orange undertones - perfect for spring and summer. I used two even coats. Then, I took my Kiss striper polish in silver and added some straight(ish) lines to the tips of my nails to bring a little bling to the manicure. Striper polishes can be a little hard to get used to at first, but once you get the hang of them they are a quick and easy way to mix up any mani!

Thanks for reading,

Maggie xoxo

Wednesday, April 23, 2014

Squared Away Glitter Gradient

Hey everyone! Today I have some nail art for you. I love glitter gradients because they are so easy to do! I started off with two coats of Essie Under Where?, a beautiful lavender creme. Then I took KBShimmer's Squared Away and layered it, concentrating most of it near my cuticle and dotting a few glitters further up the nail. Squared Away is a beautiful glitter topper with blue, pink and silver holographic square glitters and blue microglitters. I hope you enjoy!


Sunday, April 6, 2014

Cult Cosmetics Nail Polish and Makeup Review

Hey everyone! Spring is in the air! Thank goodness - it's about darn time. I have a something a little different for you all today. I was sent the Cult Cosmetics Blackbox, which included two nail polishes and a makeup palette. Lets get started!


First up is PCH, a beautiful dark teal polish with a metallic finish. The formula was perfect. At first, I was worried about brushstrokes, but after the second coat dried they were almost nonexistent. Shown below is two coats, no top coat.


The second polish is Avalon, a bright peach creme. The formula on this one was what you would expect for a creme polish of this color - it was streaky on the first coat but it evened out on the second. I was able to get away with two coats, but I could see it taking up to three to achieve full opacity. This polish dried to almost a waxy finish so make sure you use a good top coat if you want it to shine. Shown is two coats without top coat.


Okay, now this is where I, as a fairly new beauty blogger, step into the unknown! I love wearing makeup and trying new looks for my eyes and such, but I've never blogged about it, so bear with me please!

The Cult Cosmetics Blackbox came with the BH Cosmetics Malibu Eyeshadow and Blush palette. This palette comes with 16 eyeshadows and 4 blushes, all of which I swatched on my freakishly pale forearm that has the potential to sear your eyeballs. You've been warned.


Warm Tones

Cool Tones
Blushes
Overall, I'm pretty impressed with the quality of this palette. Most of the eyeshadows had great opacity, especially when used with a primer. Some, however, needed a little extra product to acquire the desired opacity. The blushes/bronzer/highlight were all very pretty and actually showed up a bit better than my pictures show. I absolutely love all of the colors in this palette and I'm happy with the mix of both matte and shimmery eyeshadows and blushes. The beachy tones will be perfect for spring and summer. I'm excited to try more looks, but for now, here's what I came up with:


You can sign up to receive your first Cult Cosmetics Blackbox by clicking here! Or if you would like to buy the polishes separately, go to https://www.cultcosmetics.com/. I hope you enjoyed this post, even though it was a little different for me. Let me know in the comments if you would like to see more posts like this!

Thanks for reading,
xoxo Maggie